


Call-Only Campaign in Google Ads: All You Need to Know in Campaign Set-up
What are ‘Call-only’ campaigns? Basically, ads created as ‘Call-only’ are fine-tuned to appear only on mobile devices that are capable of making calls.
So when somebody types in a query and your ads are shown and when the user clicks on your ad, instead of going to your website, a prompt will appear instead confirming that if they are going to call your business or not.
It’s worth noting as well that as long as someone clicks on your ad, you will get charged, regardless if they call your business or not.
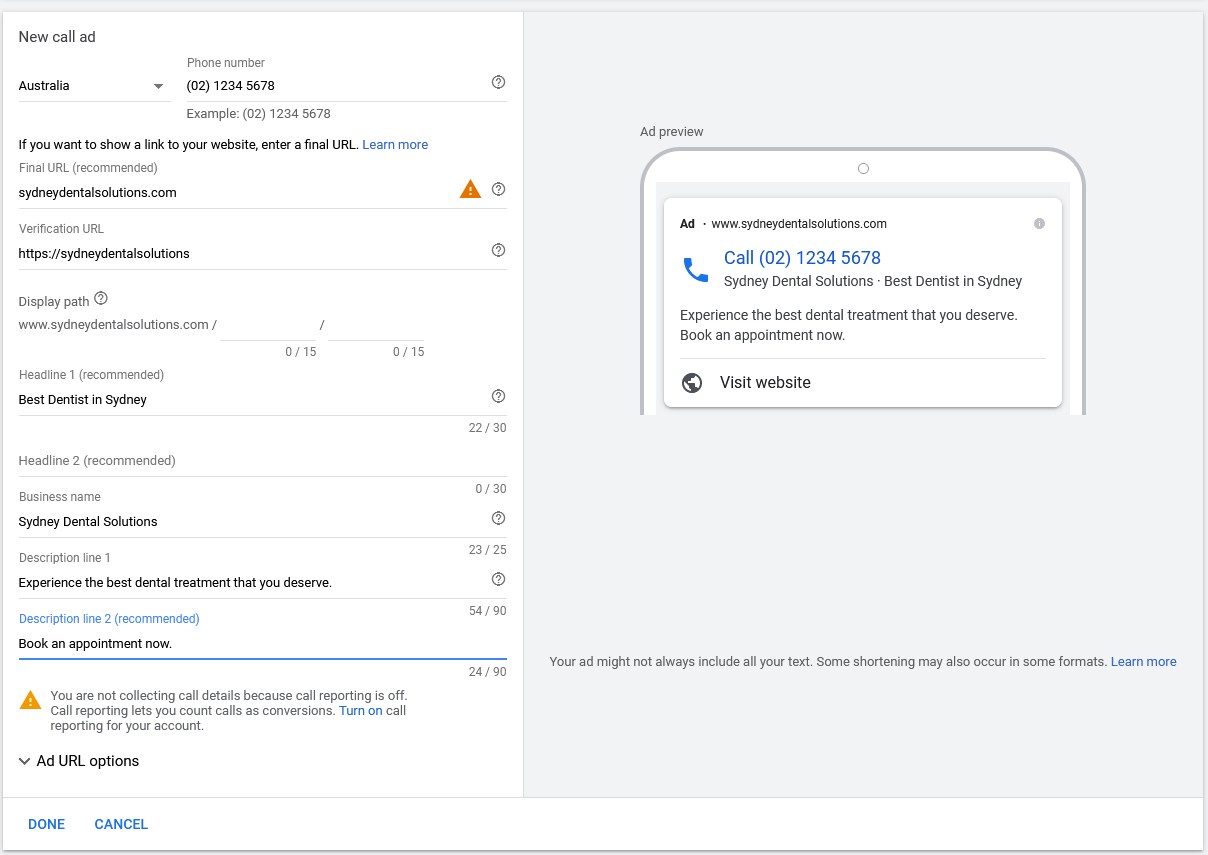
Here’s a sample of a call ad:


Setting up your Conversion Tracking
Before you jump into the campaign setup, you need to make sure that you are tracking these phone calls from Call extensions. The reason being is to see how many people are calling your business from your Call ads. And to do this, you need to set up your conversion tracking first.
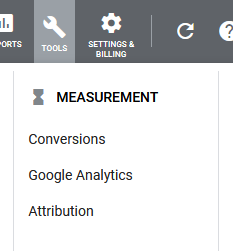
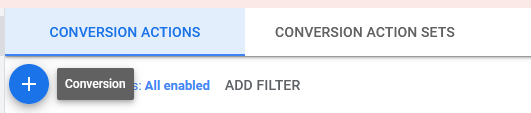
1. In your Google Ads campaign, go to Tools > Conversions.

Click the plus button to add a new conversion action

2. Select Phone calls
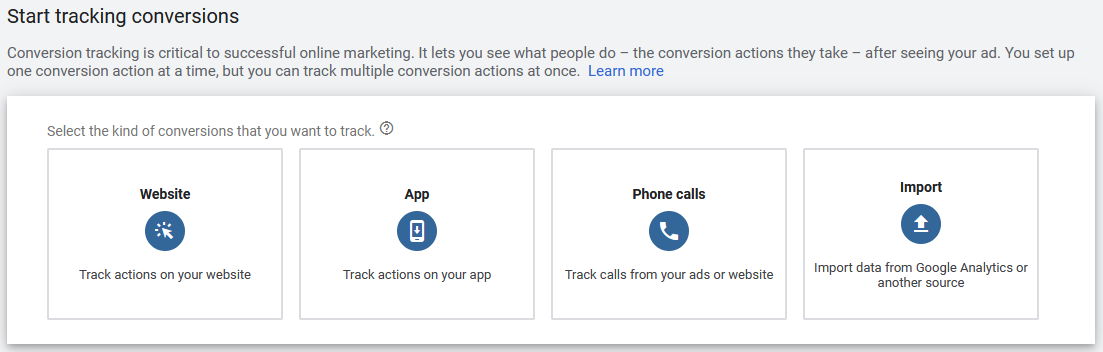

Then select the first option ‘Calls from ads using call extensions or call-only ads’


3. After that, you’ll be redirected to this page wherein you will have to fill out the rest of the information for the conversion tracking. Name your conversion action and Value. The conversion value depends on you, on how much a conversion value for you.
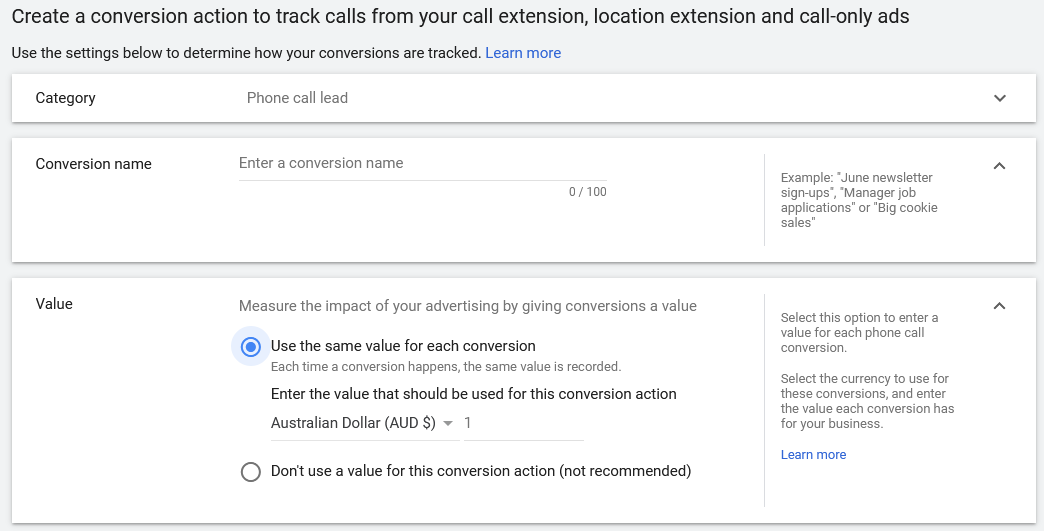

As for the count, I would suggest using ‘Every’ so you’ll know every call made to your business.
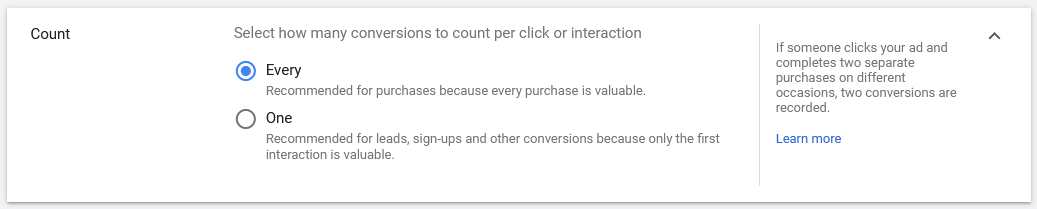

Call length is basically the duration of the call to be able to record it as a lead.


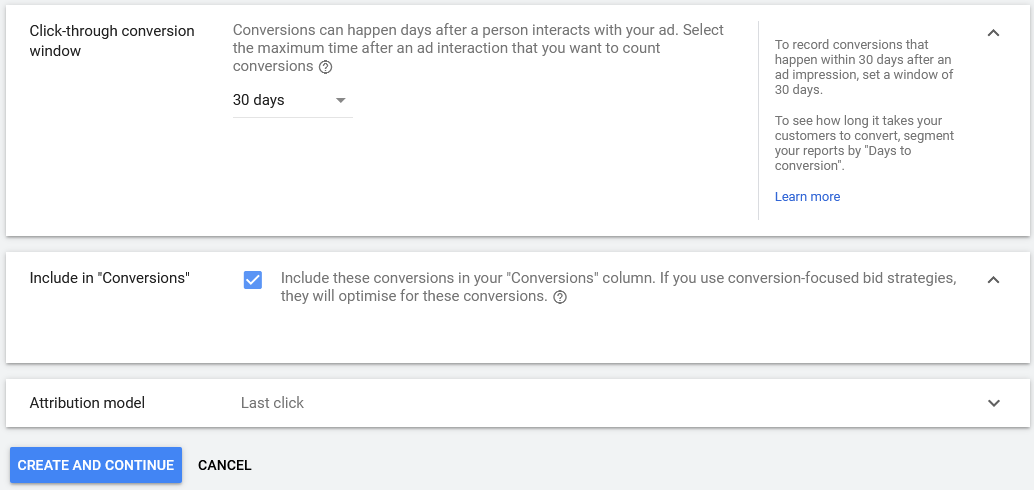
4. Leave the following as-is and click Create and continue.

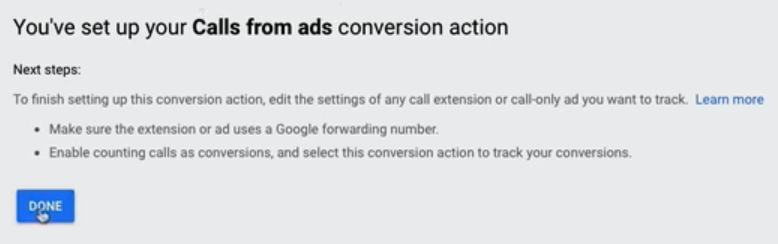
5. You will get redirected to this page after setting up the conversion tracking. Click done and start setting up your Call-only campaign.

Creating Your Call-Only Campaign and Ad
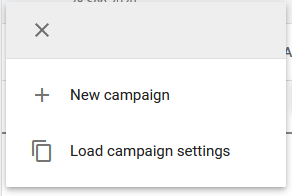
1. Create a new campaign.

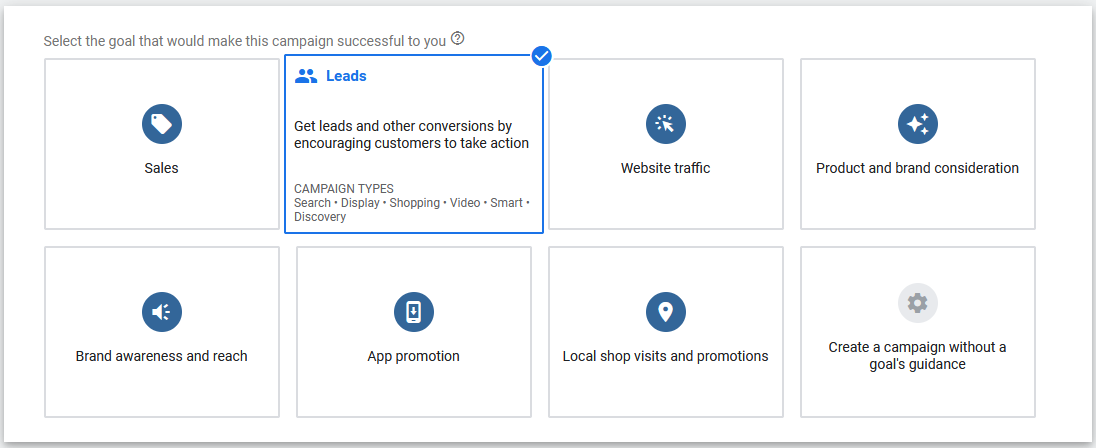
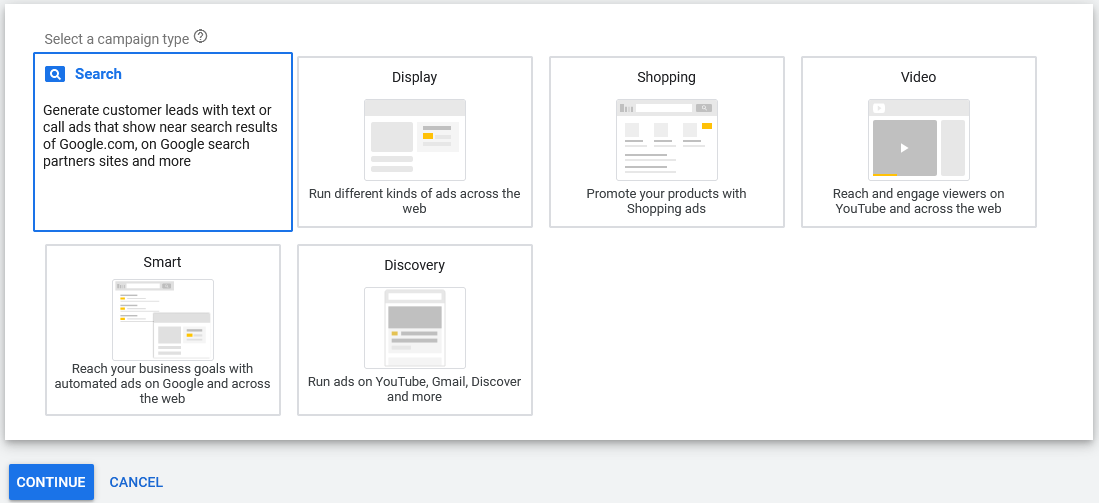
2. Select ‘Leads’ as your goal and then select ‘Search’.


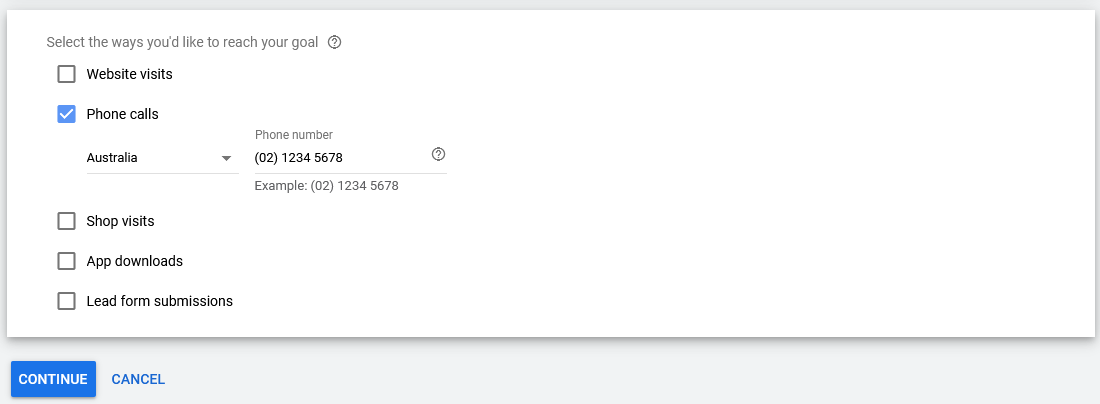
3. Select phone calls and then enter your business phone number. Then click Continue.

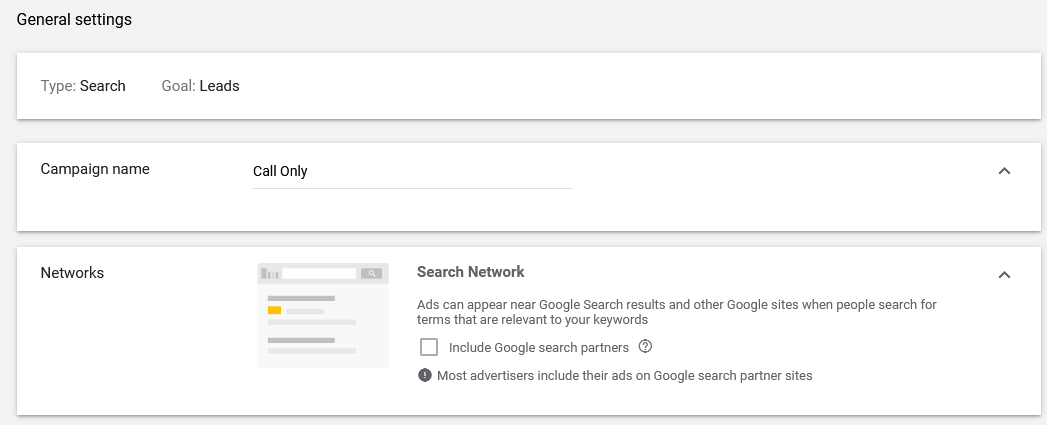
4. Name your campaign and you have a choice whether you want to include Google search partners or not. But personally, we deselect this option.

5. Set your campaign’s start and end dates. As for the ad schedule, this setting means which time of the day and days will your call-only ad appears to users. So this setting really depends on the days where your business is open and ready to receive calls.


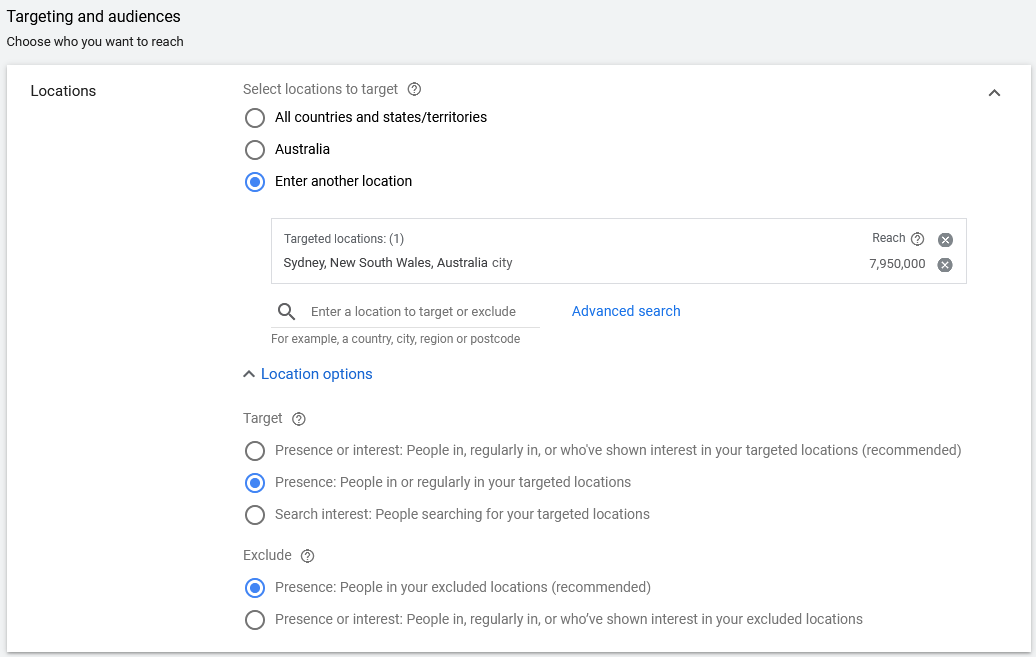
6. Set your target location, on this part make sure that you are targeting the location where your business is specifically located. So in the Target section, make sure also that you choose the second option: ‘Presence: People in or regularly in targeted locations’. That option means that your ads will only appear in people who are actually located in Sydney and not other areas.

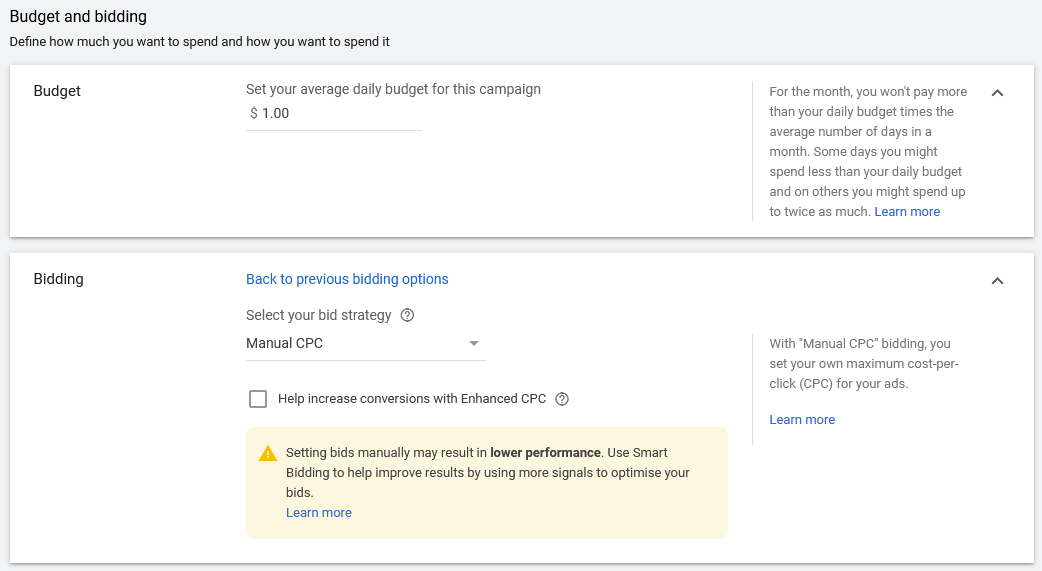
7. Set your preferred budget and bidding strategy, as you can see I chose Manual CPC so that I’ll have more control in bidding as opposed to going ‘Target CPA’ or ‘Target ROAS’ where Google has more control over the bidding. Click Save and Continue after.

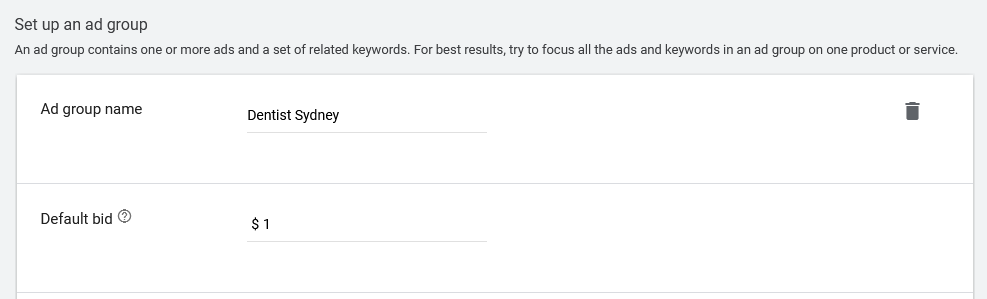
8. Set your ad group name and default bid. In terms of naming convention, we usually name our ad groups based on the keywords that we are targeting.

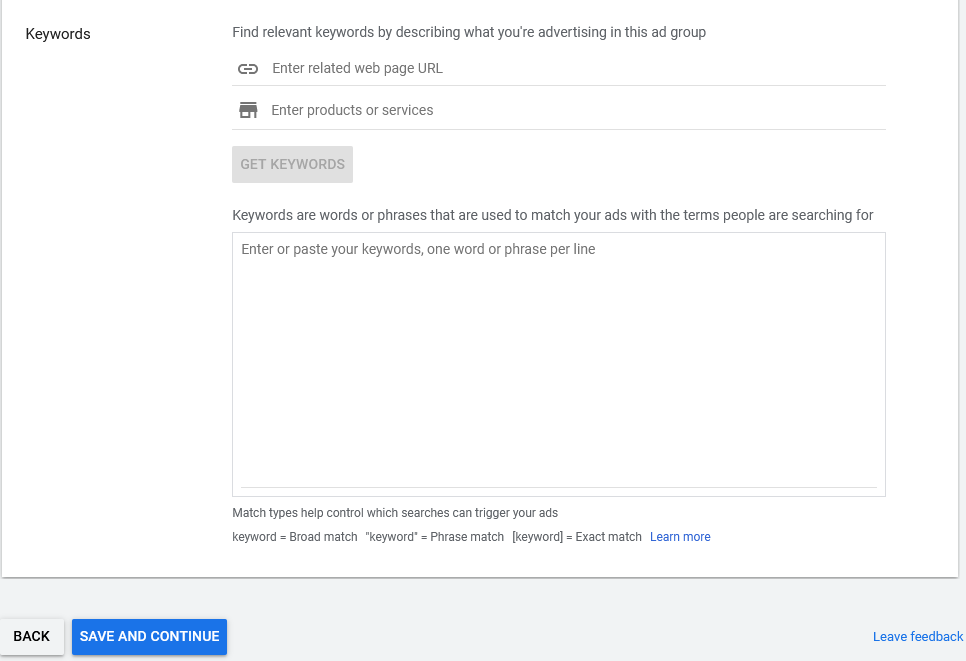
9. Enter your target keywords and then click Save and Continue.

10. Create your ad and make sure you fill out all of the necessary information. And as you can see on the right side, you’ll be able to see what your call-only ad will look like on mobile. And after you’re finished, click Done then Save and Continue.

And that’s how easy it is to create a call-only ad campaign in Google Ads!