Youtube Ads Tutorial for Beginners
In this step-by-step guide, we will teach you how to set up your campaign for YouTube Ads.
You will learn the recommended YouTube Ads targeting, video ad types, YouTube Advertising formats, and avoid the sneaky settings that will cost you more money when running your ads.
YouTube Campaigns are created and managed using Google Ads.
I will give you tips and tricks when starting out your Youtube campaign.
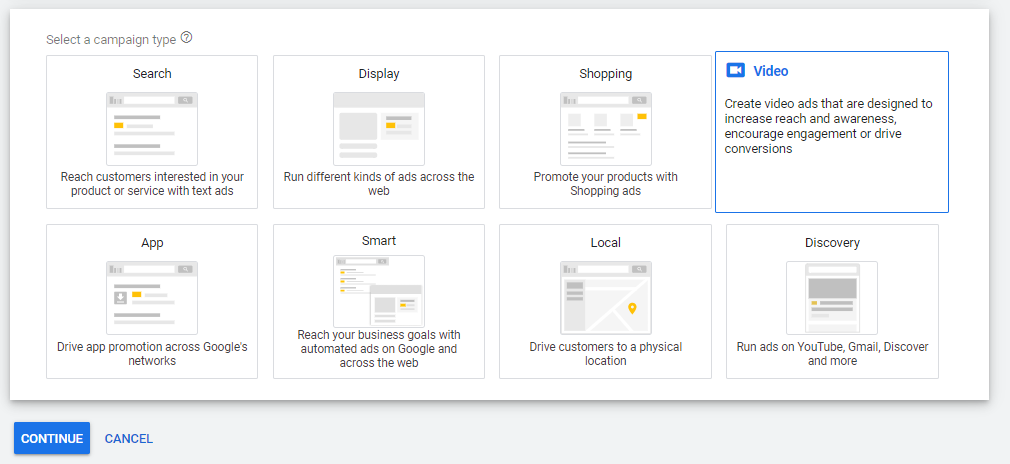
1. So in order to create our YouTube ad campaign, we’re going to need to create a video campaign inside Google ads: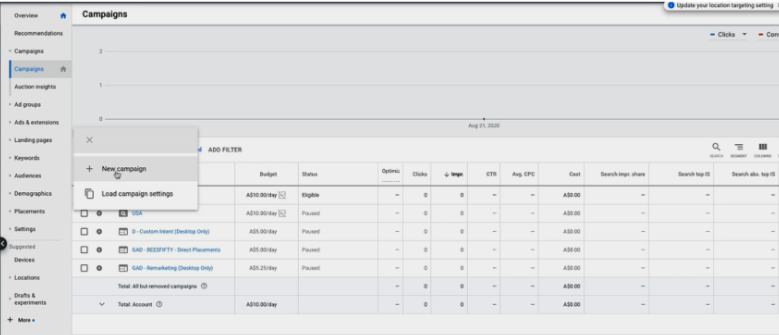

2. After you click this, Google Ads will ask you whether you want to Optimize for Sales or Sales. Since you’re starting out this new campaign and going to generate new conversions, we suggest that you start with “Create a campaign without a goal’s guidance”.
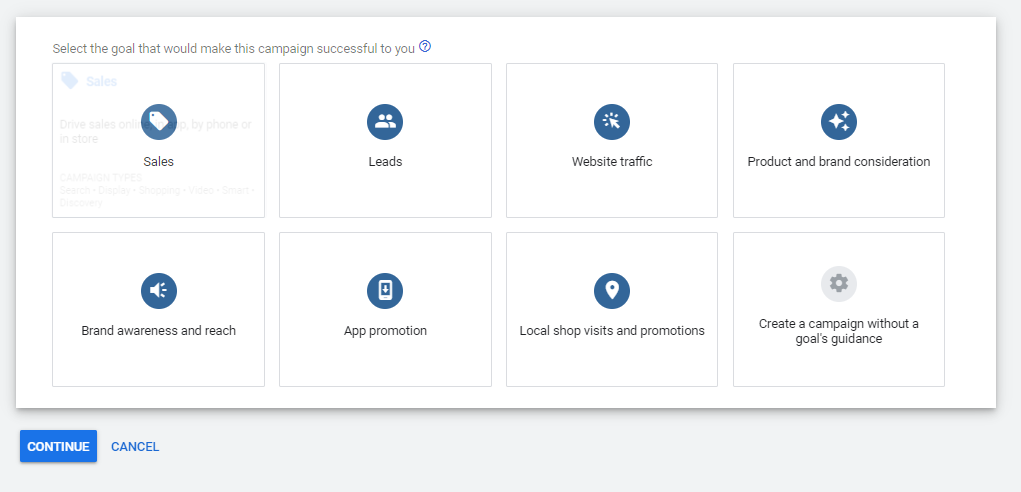

“Why?” you may ask, this is because you want your YouTube Ads campaign to run manual cost-per-view bidding. Choosing sales or leads will make Google Ads force you to do their smart bidding or automated bidding.
And if you’re starting out, we definitely don’t recommend that.
3. After choosing “Create a campaign without a goal’s guidance”. Select Video Campaign.

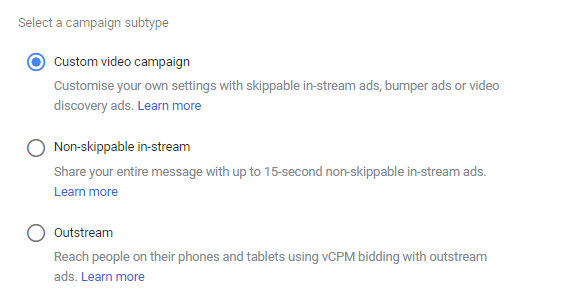
4. Once you’ve selected Video Campaign, you will now then must choose the “campaign subtype”. And there are few different types of video ads that you can do.
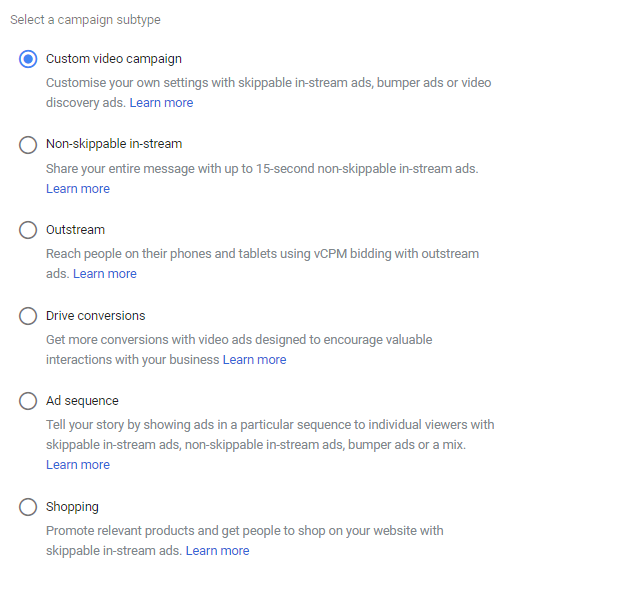

The first is an in-stream ad, which are the video ads that show up before a video you’re about to watch. We definitely recommend this if you’re starting out, doing this type of ad.

Now the second type of ad is a discovery ad, which is like an ad that shows up in the search results. We suggest that you don’t do that starting out.

And the third type of ad is a bumper ad, which is a six-second ad, that is non-skippable. And we also suggest you don’t do that.

5. You may also notice that you can do “Shopping”. You can actually incorporate your Google Shopping products below your video ad but this involves setting up your Google Merchant Center.
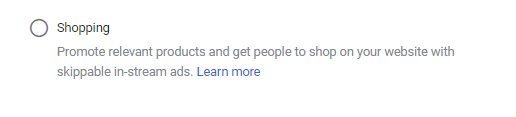

6. But starting out we recommend you do a “Custom video campaign”

7. You’ll have to provide a campaign name, while the bidding strategy is currently set to maximum CPV as the default
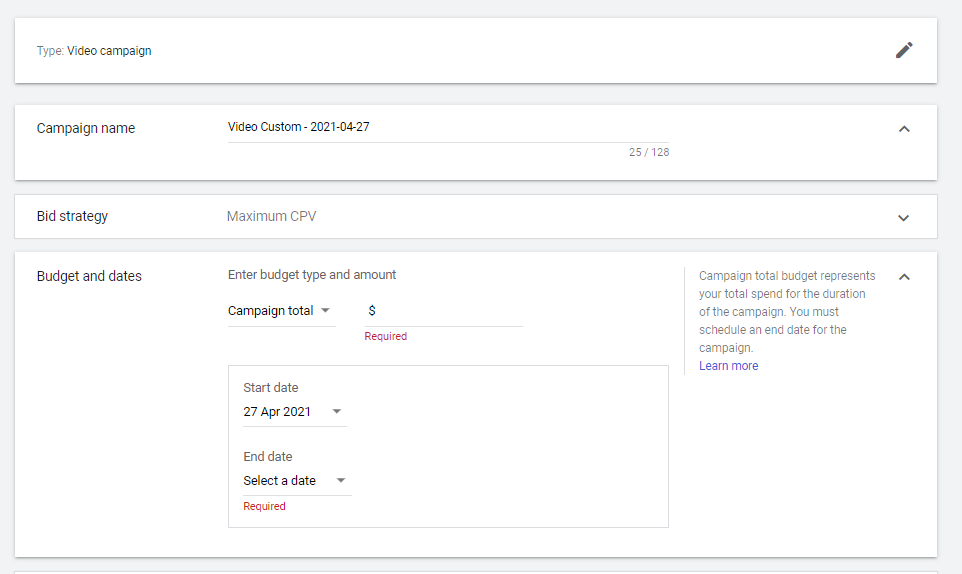

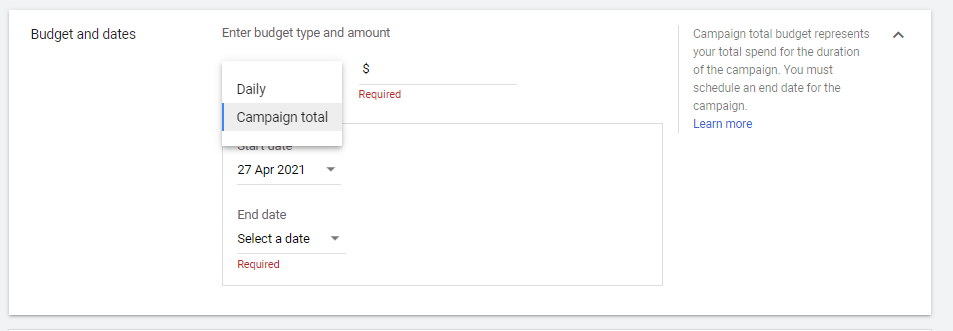
8. After naming your campaign, you’ll be asked to set the budget and dates.
In setting your budgets, you have 2 options:
- Campaign Total: This is the lifetime budget of the campaign.
- Daily Budget: Gives you more flexibility and control with your campaign spending.
As for the start & end dates, it will be your preference. If you want more control then maybe don’t set an end date, but if you will be running on a tight budget then definitely set an end date so the spending won’t rack up.

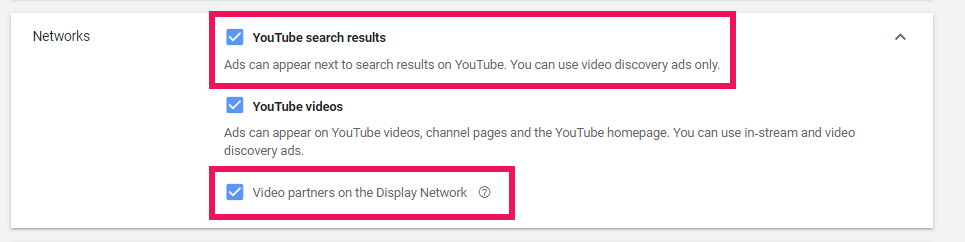
9. Next is choosing your networks. Now take note, this is where the “Sneaky Settings or Google Gotchas” are set. As you can see, Google has auto-selected Search & Display Network. Deselect these options, if you leave it checked your campaign will be spending more since you’re extending your video ads outside of YouTube space.

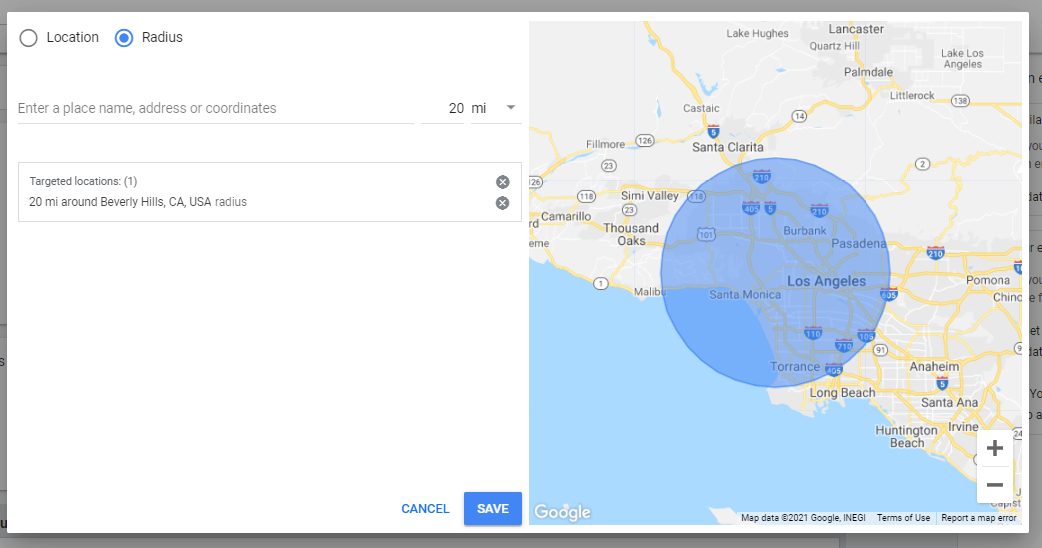
10. Set your target location. You may target or exclude a whole country or even a region or city.
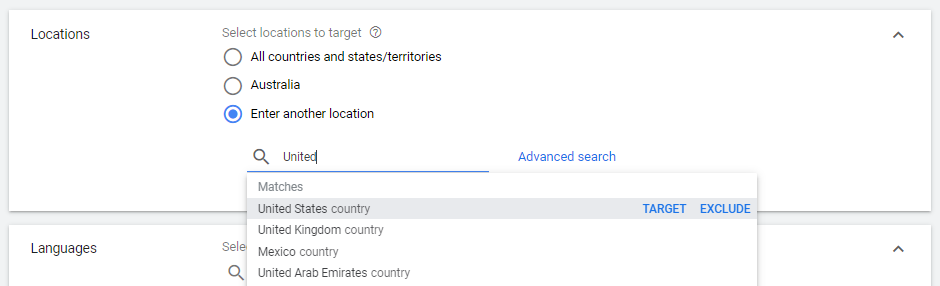

You can do granular targeting as well if you click “Advanced search” such as “radius targeting”. It means every user on the radius will be targeted by your video ad. This is an effective way to target users if you’re running video ads for let’s say your dental practice.

11. As for the Inventory, we suggest the “Standard Inventory”


12. Exclude the following areas:


13. Let’s proceed with the additional settings. By default, it’s tied to your account level conversion settings, but if you got more than one type of conversion tracking in your account then you can link this campaign to a specific conversion event.
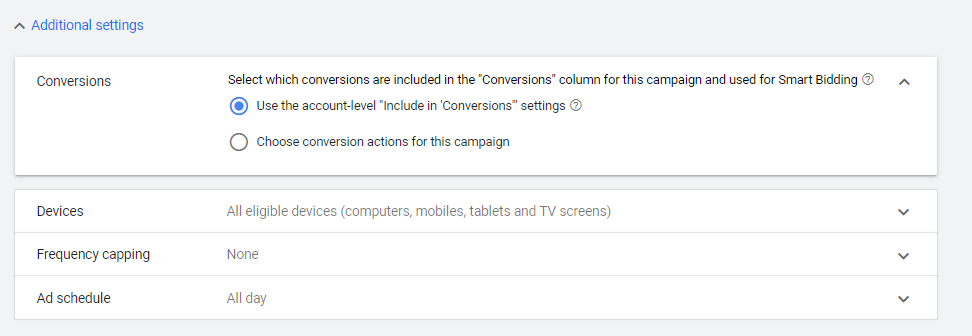

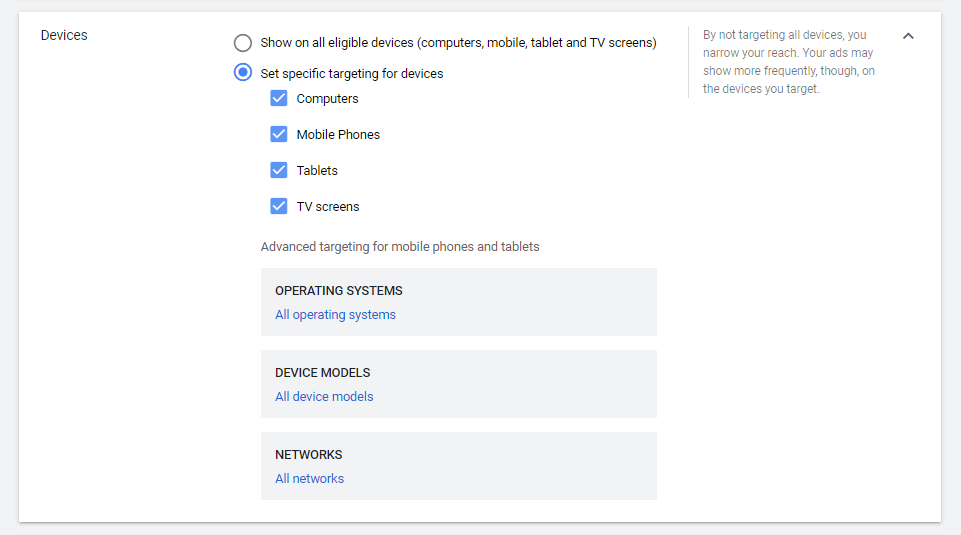
Devices. You may or may not show your video ads on all eligible devices but if you want it to be more specific, select the second option. We suggest that you deselect TV Screens because people will be having a hard time clicking your links in your video ad or most likely people watching on TV won’t bother with ads.

Frequency Capping & Ad Schedule. For Frequency capping, we like to turn that off which will prevent our ad from showing to the same person more than a set number of times. And we don’t fiddle with the ad schedule as well, basically, you can control what day or days your video ads will only get shown to people.


14. Now set your ad group name. Naming your ad group really boils down to your preference but to make it more organized, we name it on the keyword or what we’re targeting in the campaign.


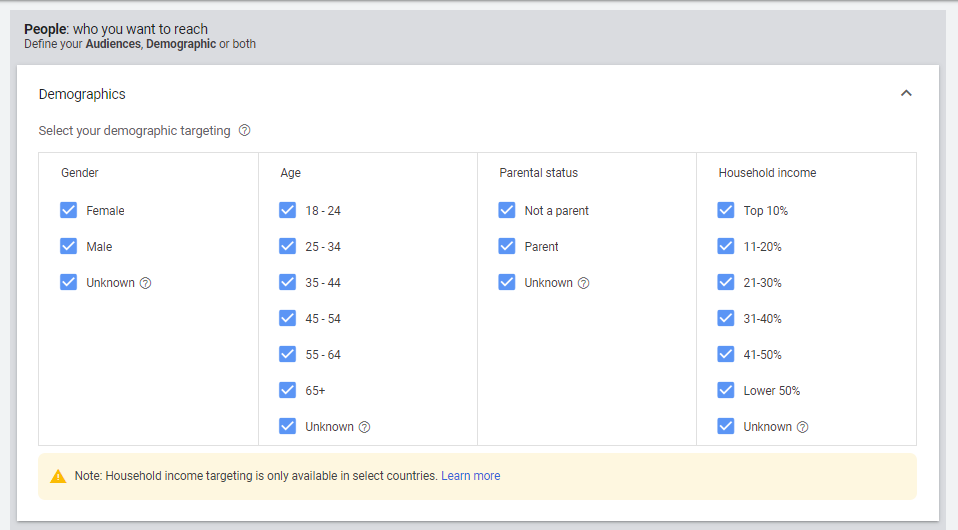
15. Select your video ad’s demographics

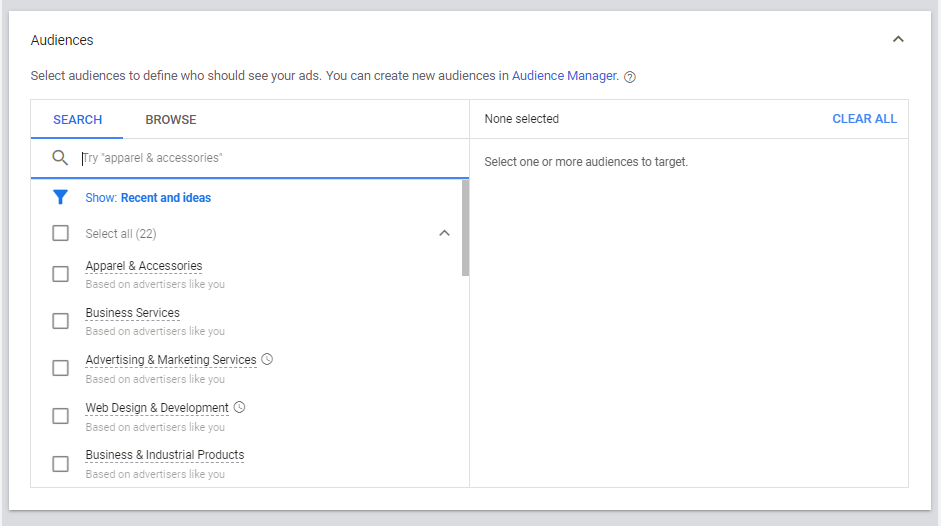
16. Audiences – if you’re not doing any in-market audiences or retargeting skip this. If you’re doing keyword targeting, then skip this as well.

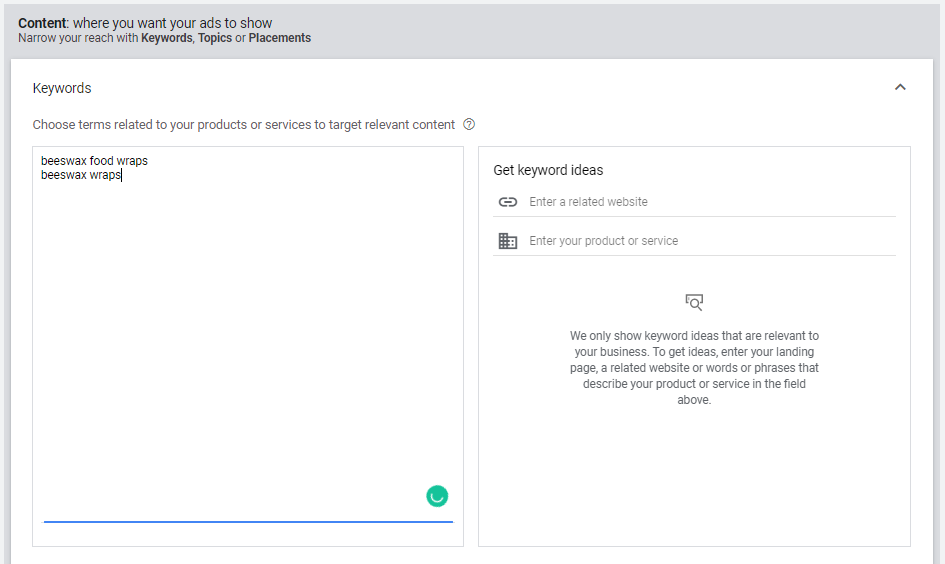
17. Set your target keywords

18. Set your preferred bid


19. Create your video ad. You have the option to upload your video or paste the YouTube link
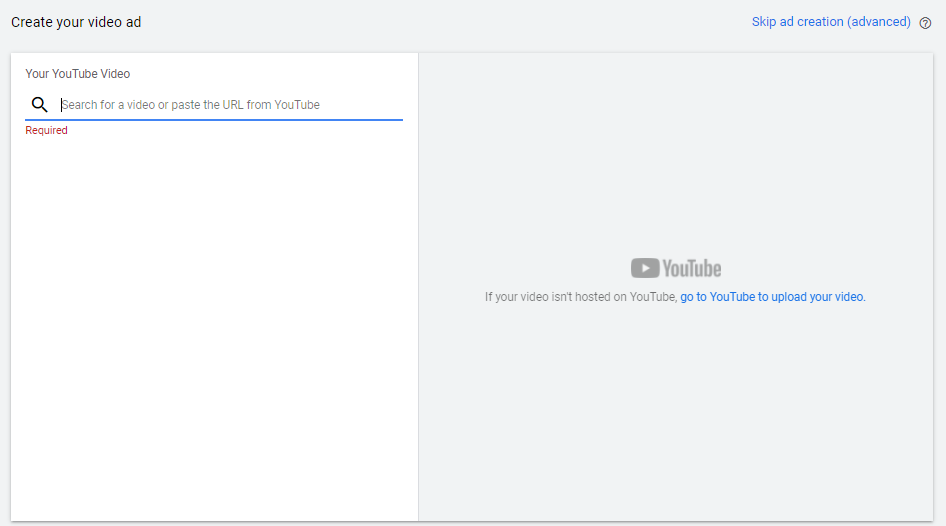

After you paste the link or upload your video, you’ll now have the option to choose what video format.
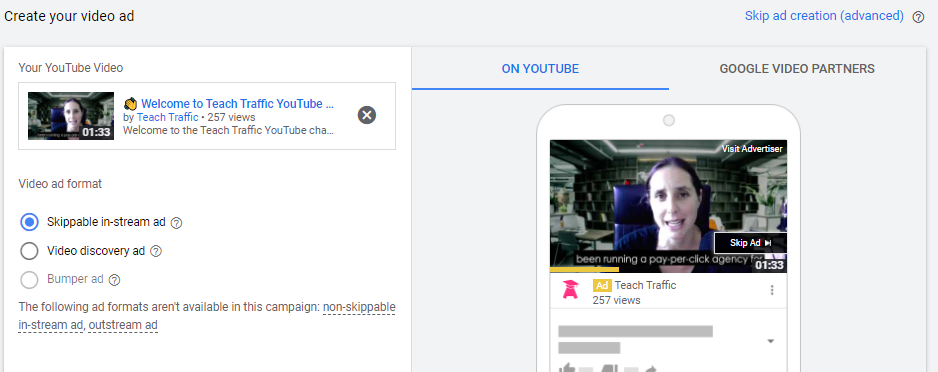

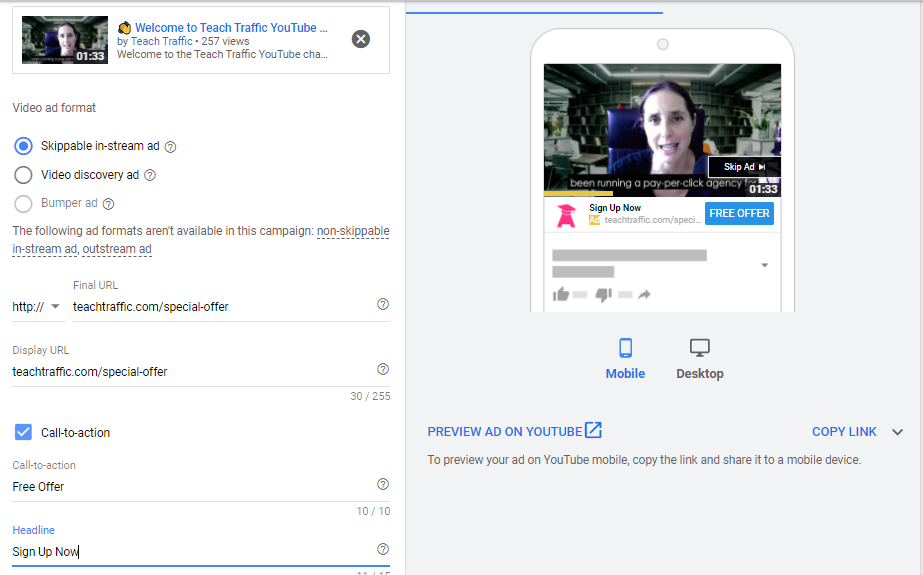
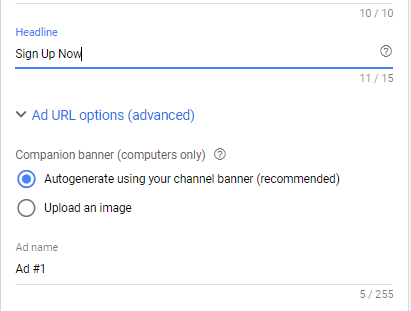
Once you’ve selected your video format, make sure to fill out the Final URL, Display URL, select Call-to-action and fill out its details.

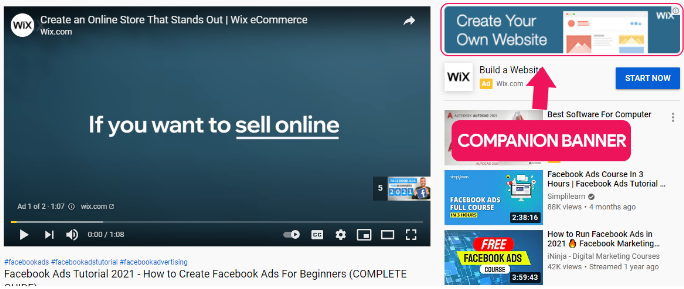
Make sure you add a companion banner as well, you can let Google Ads autogenerate the banner base on your channel banner or you can create your own and upload it. The size requirement is 300×60 pixels.

This is what a companion banner looks like:

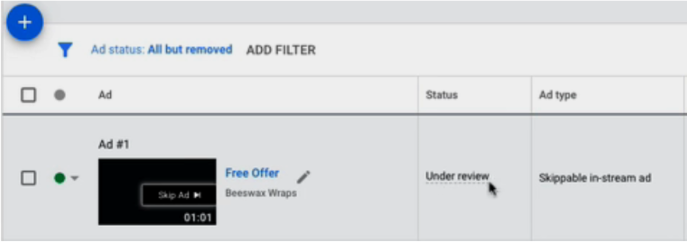
Once you’re done setting it up, you’ll be able to see the campaign and ad group you’ve created for your video ad.
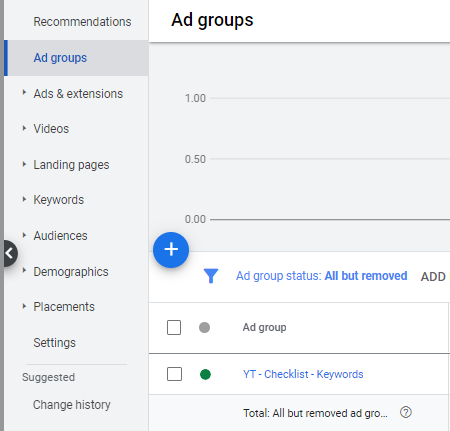

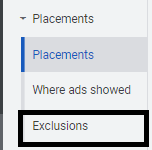
The final thing you might want to do is exclude your video ad from Kids’ videos. To do this, go to placements on the left hand side:
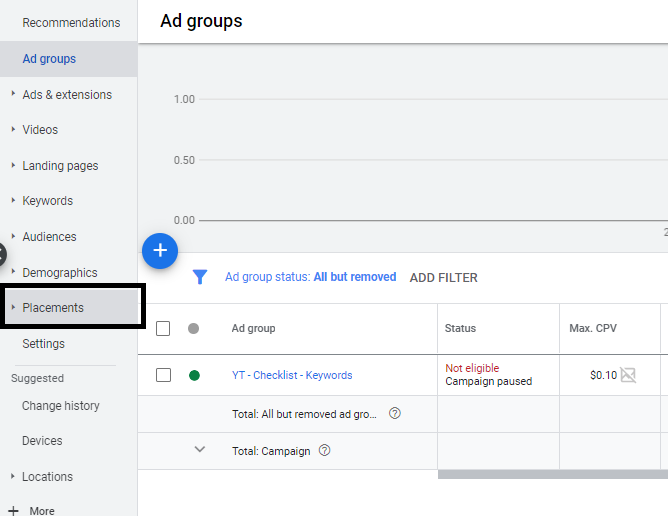

Then select Exclusions.

Click on the pencil button to add an exclusion list.
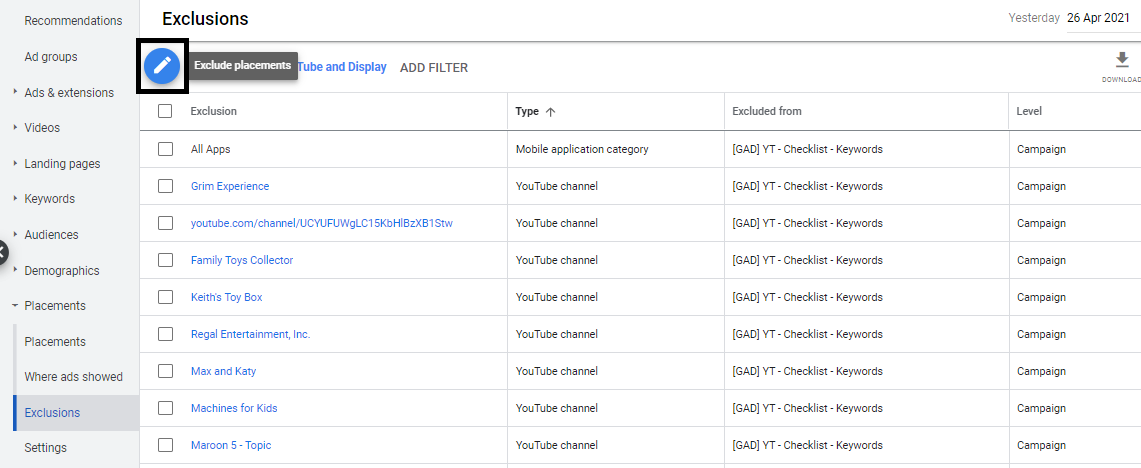

After clicking it, this page will appear. You have two options: Add placement exclusions and use the placement exclusion list. In our case, we’re using a placement exclusion list where it contains 2000 kids youtube channels that you want your video to be excluded to appear on.
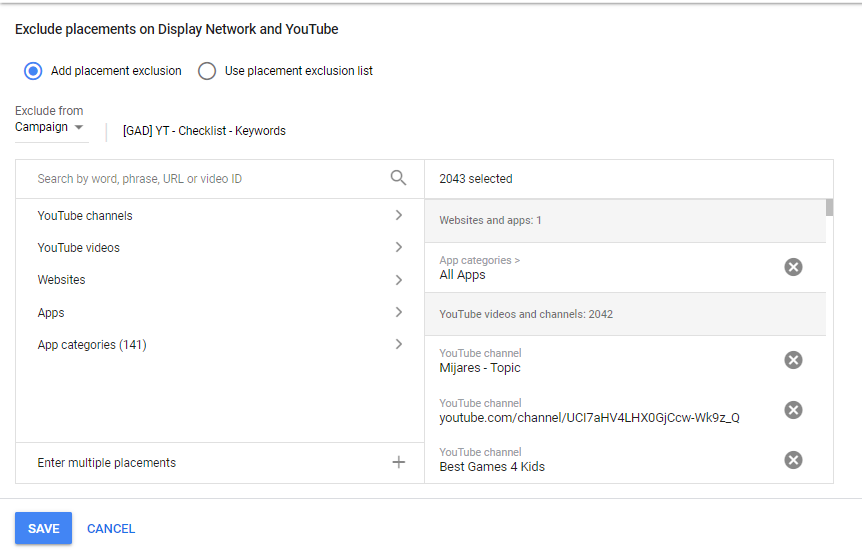

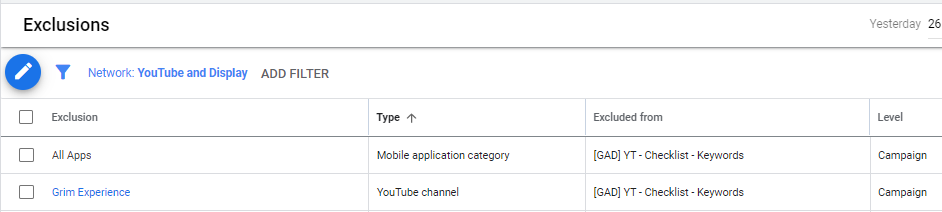
Click save after and your exclusion list will appear here:

And voila! You’re done! Do note that it takes about 24 hours for your video ad to be approved so all you can do from here is wait.